Understanding injection molding tolerances: A comprehensive guide
Injection molding is one of the most widely used and efficient production methods in the world of plastics manufacturing. However, achieving precise, consistent, and high-quality parts requires a thorough understanding of one key aspect: tolerance. This tolerance defines the permissible range of part dimensional variation caused by the injection molding process.
As a professional plastic mold manufacturer and service provider with many years of industry experience, YUCO MOLD understands that the accuracy and precision of any molded plastic part depends on understanding and controlling the injection molding tolerances. This guide will help you understand injection molding tolerances, the factors that affect them, and how to optimize them for your specific project. We will also explore various measurement and inspection techniques to verify these tolerances.
Whether you are designing a new product, solving a production problem, or looking to optimize your manufacturing process, this guide will provide you with the knowledge to effectively manage injection molding tolerances. Read on to learn more.

Understanding injection molding tolerances
What is tolerance?
Tolerance is the allowed deviation of a specified dimension or geometric feature in a manufactured part. During the injection molding process, it is nearly impossible to produce parts with exact dimensions every time due to various factors such as material behavior, processing conditions, and environmental influences. Injection molding tolerance describes how much the dimensions of a molded part can vary without affecting its fit and function. This tolerance is usually expressed as a plus or minus value from the nominal dimension.
Tighter tolerances represent a much smaller range of acceptable dimensional variation, resulting in an accurate part, but may increase production costs. Standard injection molding tolerances range from +/-0.1 mm for common parts to +/-0.025 mm for parts that require higher precision.
For example, if a part size is specified as 50mm ±0.2mm, it means that the actual measurement can vary between 49.8mm and 50.2mm. This range represents the tolerance zone for that part.
Tolerance types
Dimensional tolerance
Dimensional tolerance is the most basic and most commonly used type in injection molding. They specify the acceptable variation in linear measurements such as length, width, height and diameter. These are usually expressed as:
- Bilateral tolerance (±): Example: 100mm ±0.2mm
- Single lateral tolerance: Example: 100mm +0.2mm/-0.1mm
- Maximum/minimum dimension: Example: 99.8mm – 100.2mm
Common dimensional tolerance ranges for injection molding typically fall between the following ranges:
- Standard tolerance: ±0.2mm to ±0.5mm
- Fine tolerance: ±0.05mm to ±0.15mm
- Precision tolerance: ±0.02mm to ±0.05mm
Geometric tolerancing (GD&T)
Geometric dimensioning and tolerancing (GD&T) is a more complex system that controls geometric features beyond simple dimensions. GD&T helps specify complex requirements such as:
Form tolerances:
- Flatness: Maximum allowable deviation from a perfect plane
- Roundness: Control of circular features
- Straightness: Maximum allowable deviation from a straight line
Directional tolerances:
- Perpendicularity: How close to 90° a feature must be
- Parallelism: How parallel two features must be
- Angle: Control of a specified angle
Position tolerances:
- Position: Position of a feature relative to a datum
- Concentricity: Alignment of circular features
- Symmetry: Balance of a feature on a centerline
Common GD&T symbols and their use in injection molding:
- ⃝ Roundness: Used to control circular features
- □ Flatness: Critical for mating surfaces
- ∥ Parallelism: Critical for walls and structural features
- ⊥ Perpendicularity: Critical for assembly features
The importance of tolerances in injection molding
Tolerances are critical to ensure that parts meet and function as intended, especially when components must be assembled with other parts. Improper tolerances can result in product defects, poor performance, or increased production costs.

Factors affecting injection molding tolerances and solutions
Several factors affect injection molding tolerances. Understanding and controlling the various factors that affect injection molding tolerances is critical to achieving consistent, high-quality parts. Let’s explore these key factors and their practical solutions:
Material properties
Material selection plays a fundamental role in determining the tolerances achievable in injection molding. The material should have a uniform shrinkage rate and be suitable for the part size and design. Different polymers exhibit different behavioral characteristics that directly affect part size and stability.
Every plastic material experiences some degree of shrinkage during the cooling phase of the injection molding process, and different materials have different shrinkage rates. Amorphous plastics such as ABS, PC, and PS generally exhibit lower shrinkage (0.3-0.7%) and more predictable behavior. These materials are generally better suited for applications that require tight tolerances. In contrast, semi-crystalline plastics such as PP, PA, and POM exhibit higher shrinkage (1-3%) and more variable behavior, making tolerance control more challenging. To address these material challenges, it is important to incorporate proper shrinkage compensation into the mold design and maintain consistent processing conditions.
Another critical factor is the thermal expansion coefficient of the plastic material. As parts experience temperature changes during and after molding, their dimensions can change significantly, especially with extreme temperature changes. This requires careful consideration of the operating temperature range during design and material selection. Implementing a proper cooling strategy and maintaining consistent molding temperatures can also help minimize these changes.
Hygroscopicity or moisture sensitivity particularly affects materials such as nylon (PA) and can cause significant dimensional changes. To address this, proper drying of the material prior to processing is essential, and finished parts may also require moisture-proof packaging and storage controls.
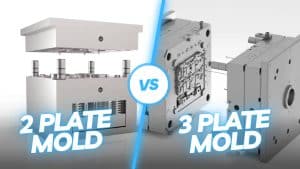
Mold design and construction
The quality and design of the mold significantly affects the tolerances that can be achieved. Molds made with high-grade steels have better thermal conductivity and dimensional stability, making them ideal for precise, high-volume applications. Mold wear can also affect the ability to hold tight tolerances. Regular maintenance is therefore essential to maintain consistent part quality.
In addition, a well-designed mold can minimize dimensional changes.
Improper gate location can lead to warpage and inconsistent part dimensions. Using mold flow analysis to optimize gate location and implementing a balanced runner system can help ensure uniform material flow and packing.
Inadequate venting can lead to burnouts, short shots, and other defects that affect part tolerances. Regularly maintaining the venting system and considering the right venting method for complex geometries can help maintain consistent part quality.
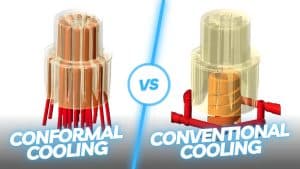
Cooling channel design can significantly impact part quality and cycle time. Implement conformal cooling whenever possible and optimize cooling channel layout through simulation to maintain even cooling distribution.
Processing parameters
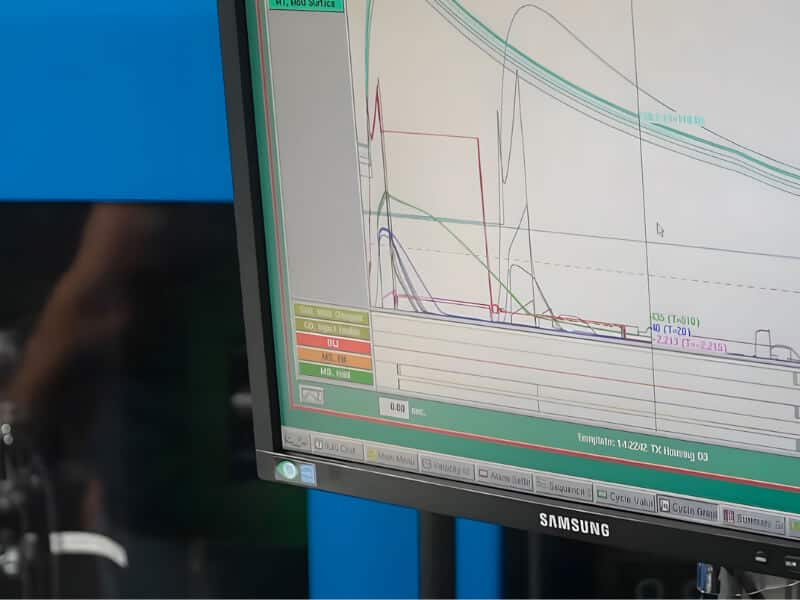
Processing parameters must be carefully controlled to maintain consistent part tolerances. Implementing scientific molding and using a variety of sensors for process monitoring can help maintain consistency.
Melt temperature control is critical because it affects material viscosity and flow behavior. Maintaining consistent melt temperature through proper barrel temperature profiling and regular calibration of temperature sensors can help ensure consistent part quality.
Cooling time must be optimized to prevent warpage while maintaining efficient cycle times. Regularly monitoring part temperature at ejection and implementing proper cooling system maintenance can help ensure consistent results. Hot runner systems are very useful for temperature-sensitive materials.
Injection pressure and speed directly affect part filling and packing, which in turn affects final part dimensions.
Part design considerations
Part design significantly impacts achievable tolerances. Following Design for Manufacturing (DFM) principles is critical to minimizing issues such as warpage, shrinkage, and misalignment during the molding process.
Parts with uneven wall thickness cool and shrink at different rates, which can cause defects such as warpage, sinking, and cracking. When wall thickness changes are required, gradual transitions should be implemented, and material-specific thickness guidelines should be followed.
Complex geometries present unique challenges for maintaining tolerances. Incorporating proper draft angles, avoiding sharp corners, and implementing appropriate reinforcement features can help achieve more consistent results.
Surface finish requirements can impact achievable tolerances. It is critical to correctly specify surface finish requirements and consider the effects of texture on tolerances. Regular mold maintenance can help maintain consistent surface quality.
The overall size of a product or its components can significantly affect tolerances. Oversized products are more susceptible to deformation such as warpage or shrinkage. Therefore, size must be considered during the design phase.
Designs should avoid sharp internal corners and use radii at internal corners to reduce warpage.
Incorporating draft angles into the design can help ease the process of removing the part from the injection mold. A draft angle of 10 to 20 degrees is generally suitable for most parts, although the exact requirements may vary by design and material.
Machine accuracy
The accuracy and consistency of an injection molding machine directly impacts part tolerances. Regular machine maintenance, calibration of key systems, and monitoring of machine performance metrics are essential. Using high-precision machines for tight tolerance applications and implementing a process monitoring system can help maintain consistent quality.
Environmental factors
Part dimensional variations can result from the molding process and material behavior being affected by temperature, humidity, and other environmental conditions. Material storage and seasonal variations in process parameters are also important factors. Proper temperature regulation and humidity level control in the production environment must ensure consistent processing conditions.
Tolerance management in injection molding
Metrology and measuring tools
In injection molding, accurate measurement is critical to maintaining part quality and consistency. What measurement and inspection techniques are available for verifying injection molding tolerances?
- Visual inspectio: This is the simplest form of inspection and provides fast and reliable measurements for basic dimensional verification by visually inspecting the part for defects such as warpage, sinking, and cracking.
- Manual measuremen: It involves manually measuring parts using basic measuring tools such as digital calipers and micrometers. It is suitable for simple parts with fewer critical dimensions.
- Automated measurement: Automated measurement systems such as vision systems and coordinate measuring machines are often used for complex parts. These systems can quickly and accurately measure parts and provide detailed reports on dimensions and tolerances. In addition, optical comparators and vision systems can perform non-contact measurements of critical features.
Inspection process implementation
A strong inspection process begins with first article inspection (FAI) at the beginning of production. The first part undergoes a comprehensive inspection, and all dimensions of the part must be measured and compared to the design specifications to ensure that it meets the necessary tolerances.
During production, regular sampling and process inspections help maintain quality standards and identify potential problems early. The inspection process should clearly record all measurements and observations.
Effective quality control relies heavily on well-trained personnel. Training programs should cover the proper use of measuring equipment, interpretation of geometric dimensioning and tolerancing (GD&T), and quality system requirements.
Regular team meetings provide an opportunity to discuss quality metrics and implement improvements. This systematic approach to quality control helps maintain consistent part quality and customer satisfaction.
Conclusion: mastering injection molding tolerances
Understanding and controlling tolerances is essential to ensure the fit, quality, and functionality of your injection molded parts. In this article, we explored how various factors affect tolerances, from material selection and part design to processing parameters and quality control. The key to achieving tight tolerances lies in careful consideration and control of these interrelated elements. Of course, post-molding processes, such as trimming or machining, also contribute to achieving tighter tolerances.
At our facility, YUCO MOLD has invested in advanced technology and expertise to fully address these challenges.
- Our state-of-the-art injection molding equipment features the latest control systems and high-precision components, allowing us to consistently maintain tight tolerances.
- We utilize advanced CAD/CAM software and simulation tools to predict and optimize part behavior before production begins, reducing development time and costs.
- Our automated production lines are equipped with advanced robotics to ensure consistent removal and handling of parts, minimizing variations in part quality.
- We use innovative materials to meet the demands of the ever-changing industry.
Contact our team of experts today to discuss your project requirements and learn how we can help you achieve the precise tolerances you need for your application.
FAQs
What are the industry standards for injection molding tolerances?
The injection molding industry relies on several established standards to guide tolerance specifications. The German standard DIN 16742 is widely considered the most comprehensive standard, providing detailed tolerance classifications from TG 1 (finest) to TG 6 (coarsest). These classifications provide specific guidance based on part size and geometric features, with achievable tolerances ranging from ±0.05 mm for the finest grades to ±0.3 mm for standard applications. International standard ISO 286-1, originally developed for metal components and now successfully adapted for plastic components, defines IT grades from IT1 to IT18, with injection molding typically in the IT7-IT14 range depending on accuracy requirements. These standards help manufacturers maintain consistency and quality across different production processes.
